Ready to tackle that craft room chaos? You're not alone! Start by evaluating your space and setting clear goals. Declutter ruthlessly – does that sequin stash spark joy? Choose smart storage solutions like clear bins and pegboards. Create zones for different activities, from cutting to painting. Don't forget to label everything; your future self will thank you! Maintain order by regularly tidying up and reevaluating your needs. Remember, an organized craft room isn't just pretty – it fuels your creativity and makes crafting more fun. Who knows? With these tips, you might just become the Marie Kondo of the crafting world!
Quick Takeaways
- Assess your current craft space, identifying functional areas and evaluating supplies to discard unused items.
- Set clear organization goals, prioritizing impactful changes and creating a timeline for accountability.
- Declutter and sort supplies using the A, B, C method: Accumulate, Break, Contain.
- Choose effective storage solutions like clear containers, labels, and vertical storage options.
- Establish functional zones for storage, working, and inspiration to maximize productivity and creativity.
Assess Your Current Craft Space
Your craft room's current state is the starting point for a successful reorganization. Ready to transform your creative chaos? Let's assess your current craft space! Start by identifying functional areas – where do you store supplies, work on projects, and find inspiration? It's time to get real about your craft supplies. When did you last use that glitter glue? If it's been gathering dust for a year, maybe it's time to say goodbye. And those frustrations? Don't ignore them! Is clutter cramping your style or lack of workspace driving you nuts? Document these pain points. Remember, organizing your craft room isn't just about tidying up – it's about creating a space that fuels your creativity. So, take a good look around. What's working? What's not? Your perfect craft room is waiting to emerge!
Set Clear Organization Goals
Now that you've taken stock of your craft space, it's time to chart your course for organization success. Set clear organization goals that'll transform your creative haven. Start by evaluating the current functionality of your space. Is it a cluttered mess that's crushing your inspiration? Or just a bit chaotic? Then, prioritize your goals. What'll make the biggest impact? Consider investing in versatile storage options that can adapt to your changing needs and maximize your available space.
- Reducing clutter by 50%
- Creating designated zones for different crafts
- Improving storage solutions for better accessibility
Create a timeline to keep yourself accountable. Maybe tackle one area per weekend? Remember, Rome wasn't built in a day, and neither is a perfectly organized craft room! As you work towards an organized and efficient space, don't forget to make regular adjustments. Your crafting needs might change, and your space should evolve with you. Ready to jump in?
Declutter and Sort Supplies
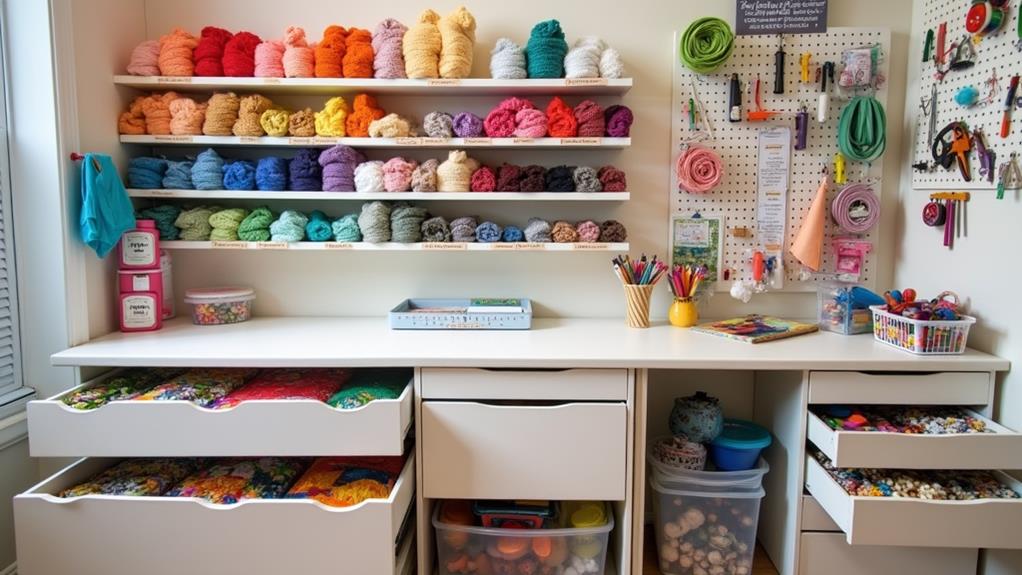
Crafters' paradise begins with a thorough decluttering session. Ready to organize your craft room? Start by gathering everything in one place. Trust me, it's like a treasure hunt! Now, let's play the A, B, C game: Accumulate by category, Break into piles, and Contain in storage solutions. It's time to assess each item – does it spark joy or serve a purpose? Be ruthless, mama! Remember, your craft space should inspire creativity, not stress. Consider investing in stackable storage bins for maximum flexibility and easy access to your supplies. These clear containers allow you to quickly identify contents and keep everything neatly organized.
Implement the one-in-one-out rule to keep clutter at bay. For every new glitter pen, say goodbye to an old one. And don't forget to review your supplies every six months. It's like spring cleaning for your creativity! With these steps, you'll transform your chaotic craft rooms into organized havens. Ready to release your inner Marie Kondo?
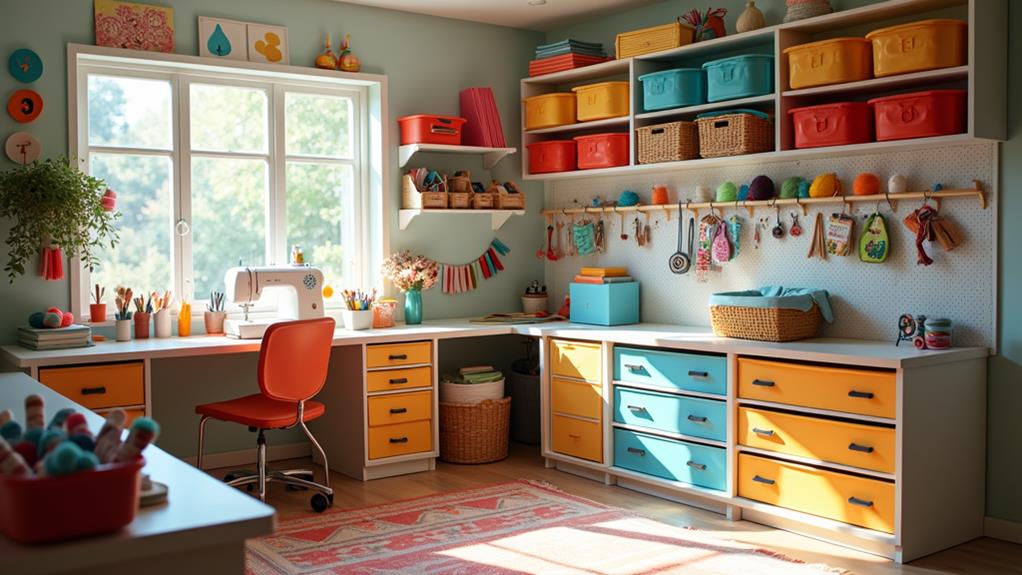
Choose Effective Storage Solutions
Selecting the right storage solutions can make or break your craft room organization. You'll want to focus on clear containers, labeled storage bins, and rolling carts to keep your supplies accessible and tidy. Acrylic floating shelves offer transparent storage for lightweight items, promoting visibility and easy access. When choosing wall-mounted options, consider the weight capacity to guarantee stability and safety. Don't forget to utilize vertical storage options like pegboards and wall-mounted shelves – they're a mom's best friend when it comes to maximizing space!
- Clear containers for easy supply identification
- Labeled bins to categorize materials
- Mobile storage for flexibility and accessibility
Establish Functional Zones

With your storage solutions in place, it's time to organize your craft room into functional zones. Establish distinct areas for storage, working, and inspiration to streamline your crafting process. You'll be amazed at how much more efficient you'll become!
| Zone Type | Purpose |
|---|---|
| Storage | Keep supplies tidy |
| Working | Flat, clutter-free space |
| Craft | Specific project areas |
| Inspiration | Fuel creativity |
| Flex | Adapt as needs change |
Dedicate a flat work area where you can spread out and focus on your projects. And don't forget to create an inspiration zone! Hang mood boards or display your favorite pieces to keep those creative juices flowing. Remember, your craft room should grow with you. Regularly assess your layout and adjust as needed. By establishing these functional zones, you'll create a space that truly nurtures your creative spirit. Isn't that what every crafty mom dreams of?
Implement Labeling Systems
Now that you've established your functional zones, it's time to plunge into implementing a labeling system. Trust me, this will be a game-changer for your craft room organization! With clear, easy-to-read labels on your storage containers, you'll save precious time searching for supplies. And let's face it, more crafting time means more "me time" for us moms!
- Invest in a label maker for professional-looking labels
- Color-code categories for quick visual recognition
- Use durable materials to withstand crafting chaos
Maintain Order and Accessibility
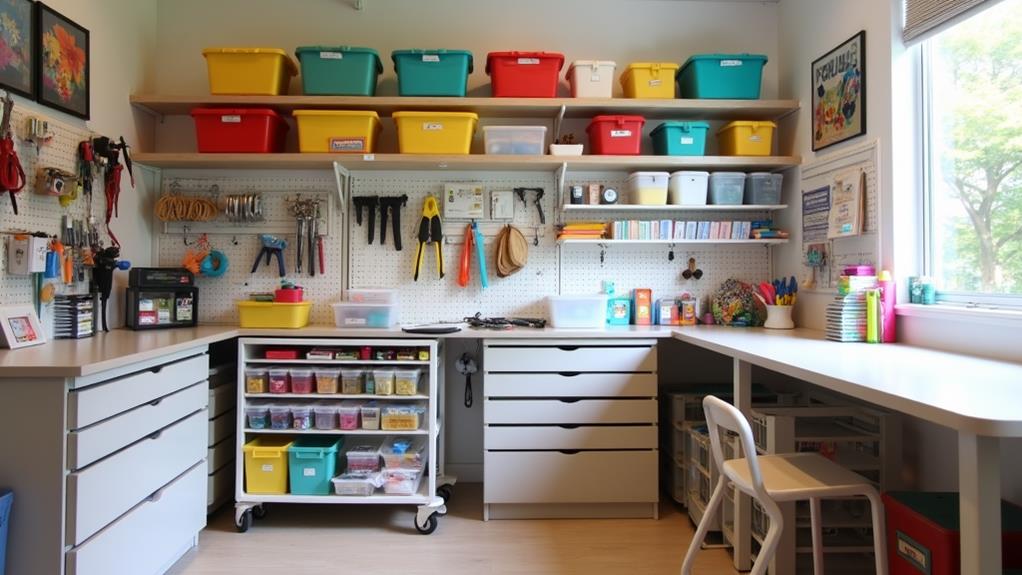
The key to a functional craft room lies in maintaining order and accessibility. Let's face it, moms: we've all been there, frantically searching for that one essential supply while knee-deep in a project. But with designated zones and clearly labeled storage containers, you'll never waste precious crafting time again! Implement a digital tracking system to keep tabs on your inventory – trust me, it's a game-changer. And don't forget to reassess and reorganize regularly; your crafting needs will evolve, just like your little ones do! Consider investing in a multi-functional craft table that offers ample storage options and a spacious work surface to boost your creativity and organization.
Make the most of vertical space with shelving and pegboards. It's amazing how much you can fit when you think upwards! By keeping your workspace clutter-free and supplies within reach, you'll find yourself more inspired and productive. After all, isn't that what we're aiming for in our creative sanctuaries
Common Questions
How Do You Set up and Organize a Craft Room?
Don't let limited space deter you. You'll create an organized craft room by evaluating your needs, grouping similar items, establishing zones, implementing smart storage solutions, and maintaining tidiness. Start with a decluttering session to maximize your space's potential.
How Do I Organize All My Craft Supplies?
Start by categorizing your supplies into groups like paper, tools, and embellishments. Use clear containers and labels for easy access. Implement vertical storage solutions and create designated zones. Regularly assess your inventory and maintain a one-in-one-out rule to prevent clutter.
How Do I Purge My Craft Room?
To purge your craft room, start by gathering all supplies in one place. Evaluate each item's usefulness and recent use. Donate or discard unused items. Create small categories to sort through. Implement a one-in-one-out rule to prevent future clutter.
How Do You Organize Your Room and Keep It Organized?
You'll organize your room by creating zones for different activities, using clear storage solutions, and labeling everything. Keep it tidy by implementing a one-in-one-out rule, scheduling regular clean-ups, and adapting your system as your needs change.


